Getting Started
Overview
>rapid response consists of two parts:
- >rapid response app – installs on the Splunk server
- >rapid response service (AppSymphony) – installs on its own host
It works like this:
- you use the>rapid response service to compose a response app by drawing its workflow diagram
- you setup>rapid response app to register that response app in Splunk
- you use Splunk to create alert with a >rapid response alert action to run your response app
- when Splunk detects an alert it triggers >rapid response to automatically run your response app
- your response app posts its progress/status back to Splunk for you to track in >rapid response dashboards
Set-Up >rapid response
1. Install >rapid response app
>rapid response app is a standard Splunk add-on app.
Click here to download >rapid response from Splunkbase.
Click here for directions to install >rapid response into your Splunk Enterprise.
2. Stand-up >rapid response service
>rapid response service is powered by AppSymphony, our rapid app composition platform. It may be stood up on your own physical or virtual host, or in a cloud service such as Amazon Web Services (AWS). You can launch the >rapid response service yourself via the Amazon AWS Marketplace. Contact us at sales@optensity.com for a wide range of installation and licensing options, including our try-before-you-buy program.
3. Setup >rapid response service
>rapid response recommends the use of SSL to encrypt the traffic between the >rapid response service and the >rapid response app. In order to do this you first need to enable SSL on Splunk per their instructions. Once set up, you will then need to configure the >rapid response service to trust the certificate used by the >rapid response app to encrypt the traffic between itself and 3rd party services. The >rapid response service simplifies this process by allowing you to compose a simple app that will help guide you through some of the tedium that is required. First, pull up the >rapid response service in a browser. Once loaded, you can navigate down the menu on the left-hand side of the browser window to the “SECURITY” ensemble. You will want to drag the component, “Certificate to Truststore” onto the canvas as seen below.

Excellent! Our next step is to add a terminating component to complete our graph. If you again navigate down the left-hand side of the screen you will find a “TEST” ensemble. Drag the component, “Test” with the aqua background and equal sign onto the canvas as seen below.
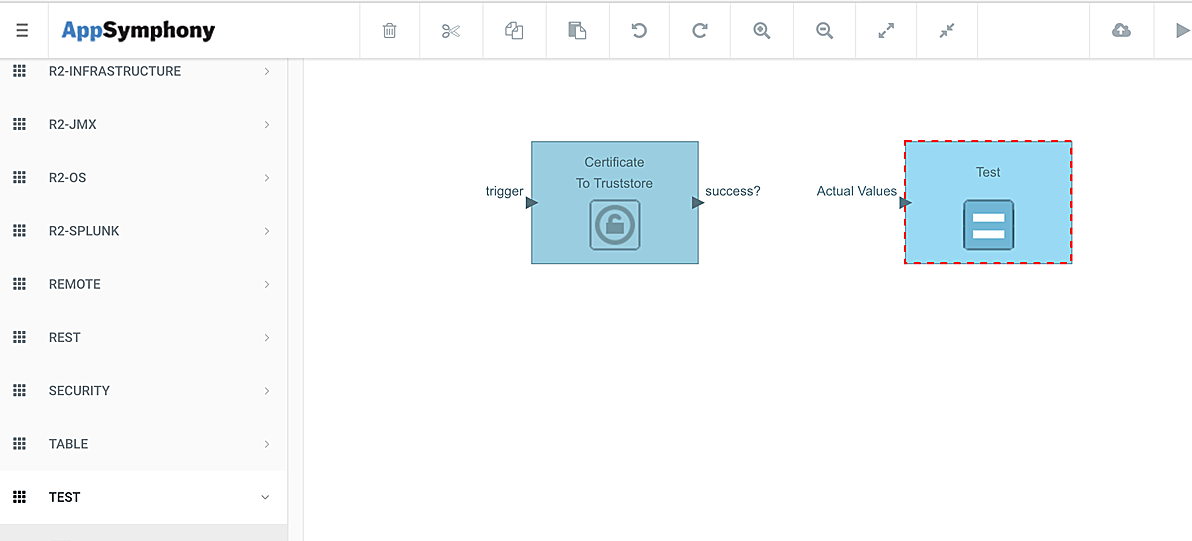
Finally, let’s connect the two components. Simply, left click on the triangle next to “success?” on the first component and drag the mouse over to the other component’s “actual values” triangle, at which point you can let go of the mouse button. Voila! You have completed the graph. The next step is to configure the components. In this app, we will only need to configure the “Certificate to Truststore” component. To do so you will hover over the component and when it presents it’s gear icon, left click on it. You will then be presented with the configuration options as can be seen below.
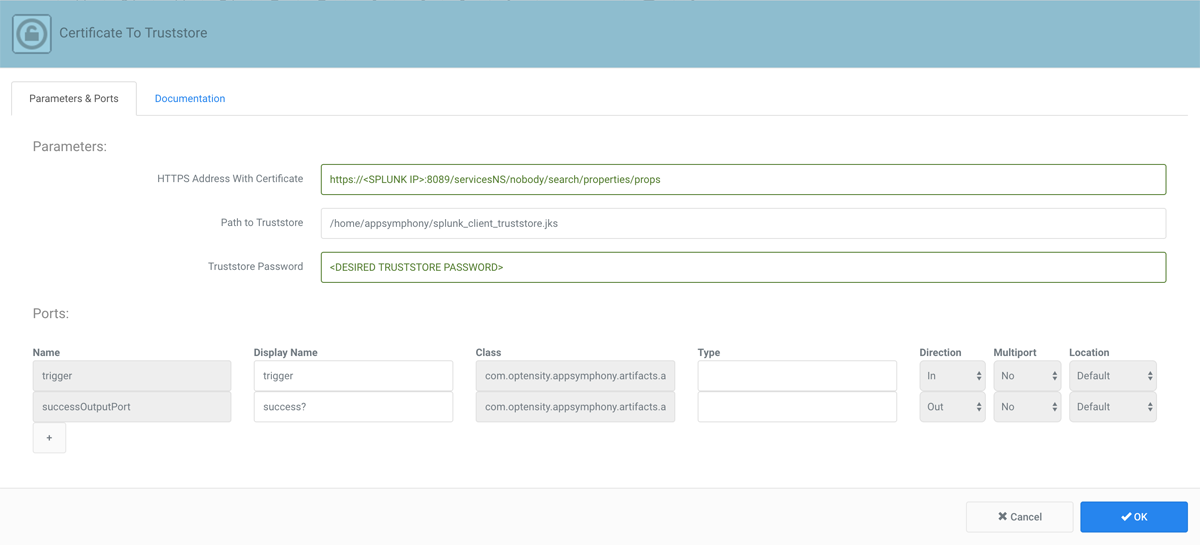
You will want to add the parameters as seen in the picture, replacing with the IP address of your Splunk server and with the password you wish to use to protect your newly created >rapid response service truststore password. When you have entered this information click “OK” to confirm your selections and click the triangle button on the top command bar to execute the application.
Once executed you will have a truststore containing the certificates necessary for SSL communication located in the path specified in the settings. The final step that we need to take is to modify an environment settings file to take advantage of our new truststore.
We need to open up a terminal session into the machine with the >rapid response service installed. At the terminal we will want to load the following file
/home/appsymphony/mas/tomcat/apache-tomcat-7.0.69/bin/setenv.sh
into our favorite editor. We want to update the line that reads
CATALINA_OPTS=”-Xms1024m -Xmx4096m”
to instead read as
CATALINA_OPTS=”-Xms1024m -Xmx4096m -Djavax.net.ssl.trustStore=/home/appsymphony/splunk_client_truststore.jks -Djavax.net.ssl.trustStorePassword= -Djavax.net.ssl.trustStoreType=jks”
of course replacing with the same password entered on the configuration screen above. Save the file and exit.
The final step is to restart the >rapid response service web application by issuing the command
sudo service appsymphony-web stop
followed by
sudo service appsymphony-web start
4. Set up >rapid response app
>rapid response app has a standard app setup form, which Splunk displays the first time you open >rapid response. You can also access the setup form through Splunk’s Manage Apps view by clicking the Setup link toward the right of the>rapid response entry as shown.

Fill in the rapidresponse Service URL file with your >rapid response service info. Then fill in the the splunk Username and Password fields with the credentials that you want>rapid response service to use when it post response status back to Splunk – this will usually be username and password that you login to splunk with. The account must have permissions as noted in 4 below.

>rapid response uses the ‘main’ Splunk index by default. If you wish, you may create a separate index for >rapid response and then enter that index name in the Splunk Index field.
>rapid response app dynamically queries >rapid response service to get the latest list of available response apps. Check the ‘Get recovery apps…’ checkbox.
NOTE:>rapid response service is distributed with a template app. So you should check the ‘Get recovery apps…’ box the first time you configure >rapid response app so you can use the template app to verify your installation.
Then click Save to store your settings.
5. Set up a Role >rapid response Users
Splunk encrypts your password (see 3 above) while its stored, and decrypts it when you use the >rapid response app. Therefore each >rapid response user must have the “list_storage_passwords” permission on her account. Only the Splunk administrator can grant permissions to user accounts.
We recommend that when your Splunk administrator installs >rapid response, she/he also creates a new Role called rapid_response_user that inherits from the user, splunk_system_role and can_delete roles, as well as adds the “list_storage_passwords” capability. The administrator should then assign the rapid_response_user role to all users who intend to use>rapid response.
If a user tries to access>rapid response without this permission, you will see errors in $SPLUNK_HOME/var/logs/splunk/python.log that include the following:
“…HTTPError: HTTP 403 Forbidden — You (user=username) do not have permission to perform this operation (requires capability: list_storage_passwords).”
Verify your >rapid response Installation
>rapid response service is distributed with an app called testRapidResponse that helps you test that your alerts and response apps are working correctly. The following describes how to use testRapidResponse to verify that your installation is complete and correct.
1. Create an alert with a >rapid response alert action
In this step you will create an alert to test>rapid response installation. (If you wish, a pre-built test alert called “rapid response example alert” may be found under the Alerts menu. Simply enable it and skip to Step 2.) In Splunk, navigate to the >rapid response app. Then click the search menu and enter a test search as shown, click on the magnifying glass to run the search (should not return any results), then click Save As an Alert.

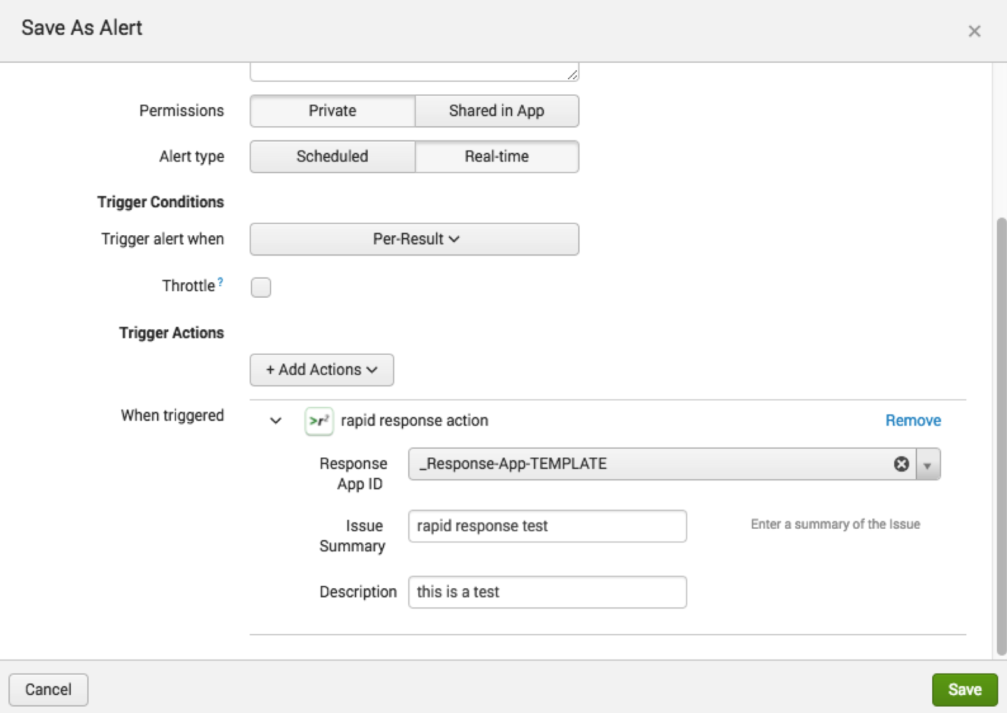
On the Save as Alert view, fill in the Title field, click on the Real-time alert type, and then click on the Add Actions button.

Scroll in the Add Actions popup menu to find and click on Rapid Response Action.

Click on the Response App ID dropdown and select _Response-App-TEMPLATE as shown. Next fill in the Issue Summary and Description, and then click Save.
2. Open and run the testRapidResponse app
In >rapid response service, type ‘testRapidResponse’ into the search (binoculars) field. You will see the testRapidResponse app appear below as shown. Click-hold on testRapidResponse app and drag it onto the canvas to view it’s workflow, which simply posts an event to Splunk. Then click on the run arrow to launch the app.
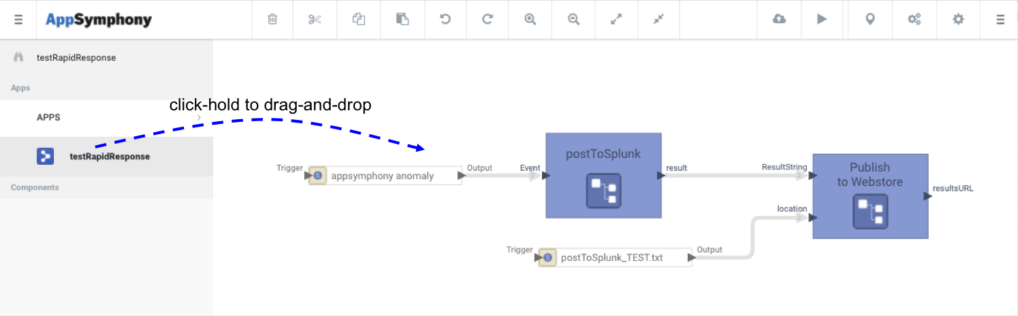
Be sure to fill in your splunk credentials in the form yourUserName:yourPassword and yourSplunkURL in the appropriate fields, then click Run.
3. View Test Results in >rapid response Dashboards
The >rapid response test app completes almost immediately. In your browser click on the Rapid Response Monitor menu on the green navigation bar to view the case monitor dashboard.
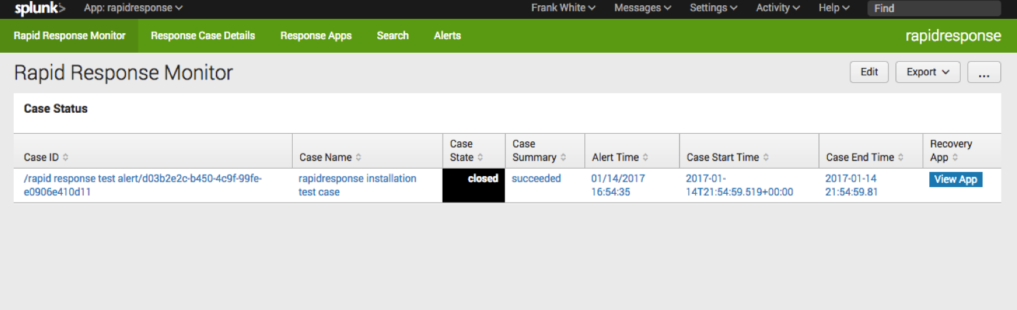
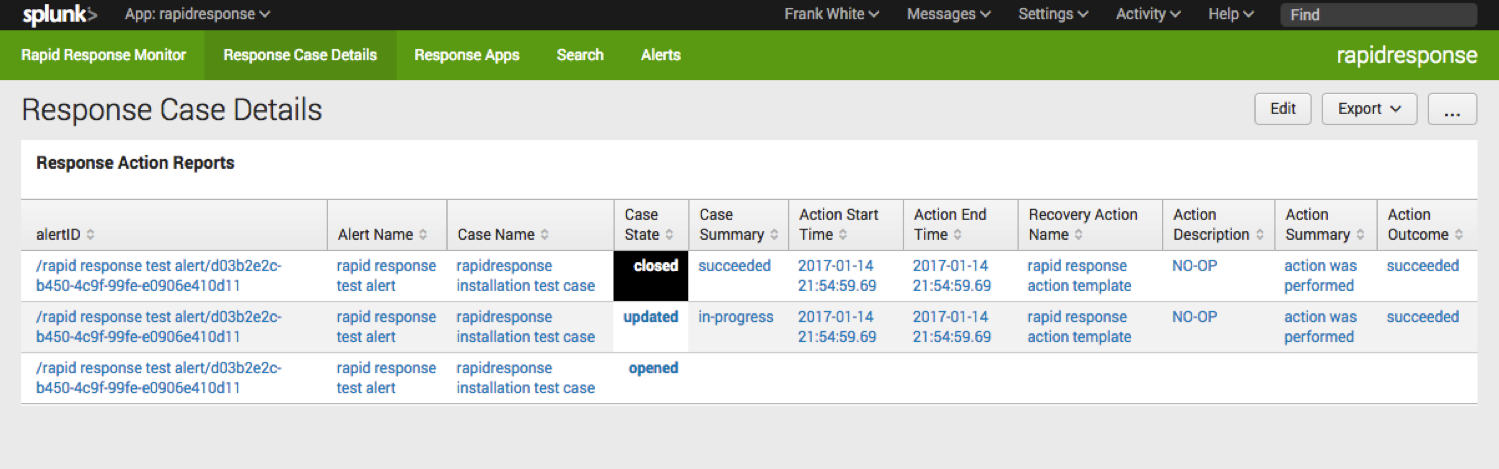
Each row in this dashboard table represents the summary results of a single >rapid response alert action case. Click on the Case ID entry to drill down to the Response Case Details dashboard to review the detailed results of each response action in the case.
This completes >rapid response installation testing. Be sure to disable the test alert when you’re done.
What’s Next?
Learn how to compose >rapid response apps