
If you’d like to run an AppSymphony Web instance on Amazon’s Elastic Compute Cloud (EC2), then you’ve come to the right place! Please read on.
Launching an AppSymphony Instance
Getting AppSymphony Web Support
Target Audience
This document is aimed at readers with some experience using Amazon Web Services (AWS), and more specifically AWS’s EC2. To be clear, the following assumptions are made about you, the reader:
- You already have an AWS account
- You know how to log in to your account through the AWS Management Console
These assumptions are few, but important. And don’t worry if we’ve assumed too much, you can probably meet the above criteria in about 10 minutes by visiting the AWS webpage to create an account.
Signing Up for AppSymphony
The AWS Marketplace requires users to ‘subscribe’ to a software AMI such as AppSymphony Web before using it the first time. Once you have subscribed, you can launch as many instances as you need without having to go to the Marketplace again. Fortunately, the Marketplace provides a very simple 1-Click subscription process that takes just a minute or two to complete.
Be sure to login to your AWS account, and then click the web address below to go to the AppSymphony Web listing on the Marketplace, shown.
https://aws.amazon.com/marketplace/pp/B00MOZP1M6
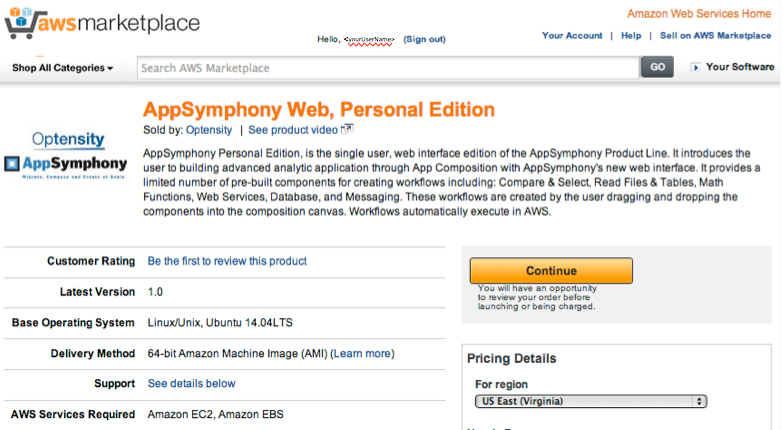
This page provides lots of useful information about AppSymphony, including links to product documentation and support. It also lets you explore the different options for running AppSymphony Web on AWS. When you’re ready, click the [Continue] button.
The Launch on EC2 page, shown, allows you to specify the details of the instance to launch. There are two options to choose from. 1-Click Launch lets you launch an instance using default setting. Simply click the [Accept Terms & Launch with 1-Click] button and the instance will start launching immediately. You can optionally override any of the default Version, Region, EC2 Instance Type, VPC Settings, Security Group or Key Pair settings by clicking on the corresponding accordion tabs.
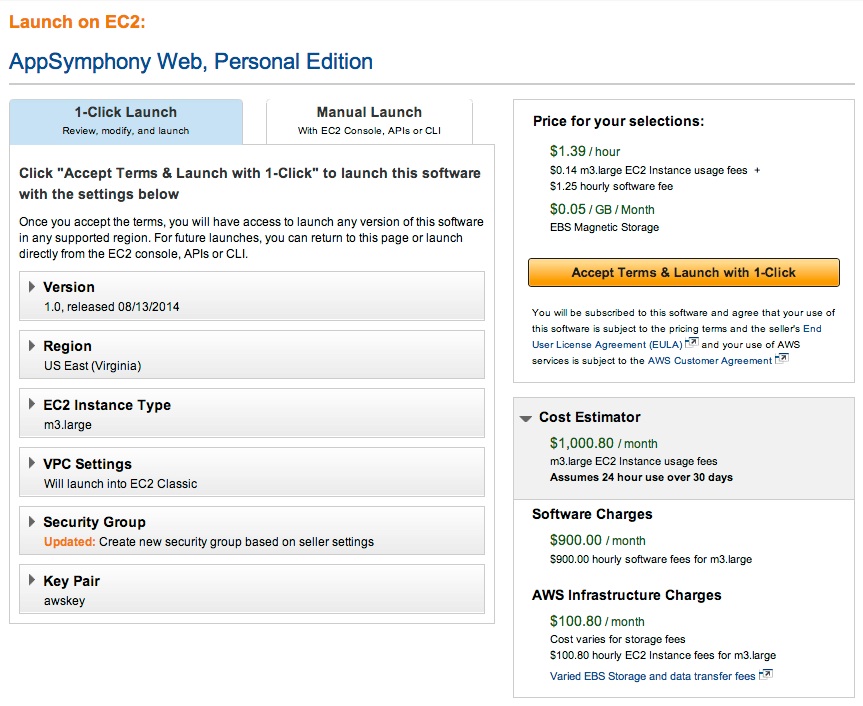
If you want to subscribe to AppSymphony Web but not launch an instance at the same time, you can click the Manual Launch tab. Click the [Accept Terms] button to subscribe.
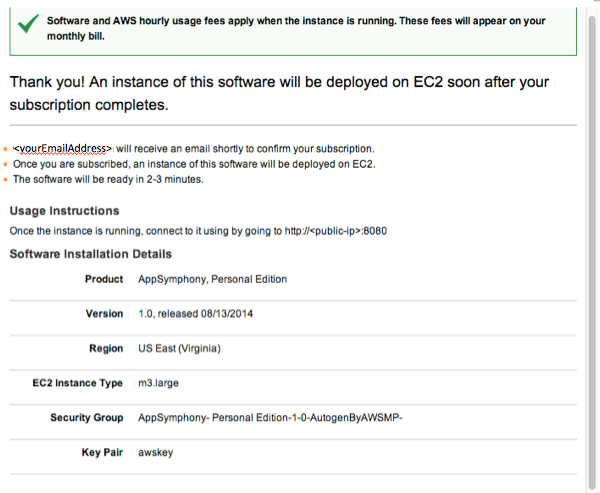
An email will be sent to your AWS account email address to confirm your subscription.
Click on one of the [Launch with EC2 Console] buttons to go to your EC2 console and launch an instance in the selected region.
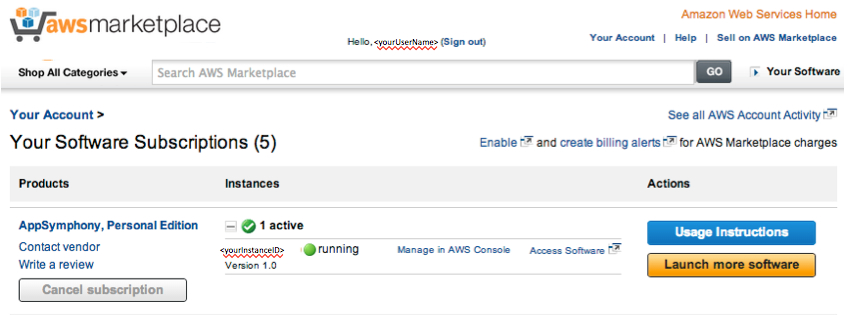
You can easily check on all of your AppSymphony Web instances using the Marketplace Manage Subscriptions page.
Finding AppSymphony Web AMIs
Once you’ve subscribed, you can continue to launch instances from the AppSymphony Web Marketplace page directly. Or you can search for AppSymphony AMIs and launch instances using your AWS console:
- Log in to your AWS Management Console: http://aws.amazon.com/console/
- Click on EC2 to open up the EC2 Dashboard
- Click the Launch Instance button
- Click the AWS Marketplace tab
- Enter appsymphony into the search field, press your [enter] key
Choosing an AppSymphony Web AMI
Personal Edition
AppSymphony Web Personal Edition provides a limited AppSymphony capability with a broad range of general-purpose component ensembles.
Pro Edition (winter 2015)
AppSymphony Web Pro Edition includes everything in the Personal Edition plus additional component ensembles, including Hadoop and Map/Reduce support.
Enterprise Edition (spring 2015)
AppSymphony Web Enterprise Edition includes everything in the Pro Edition; several more component ensembles; and support for multi-user access controls on components, ensembles and composed apps in a shared repository.
Launching an AppSymphony Instance
Continuing from the Marketplace search results listing the AppSymphony AMIs, you should see a Select button on the right of each AppSymphony AMI. Please follow these steps to launch your AppSymphony AMI:
- Click the Select button next to the AppSymphony edition you would like to launch
- Select the 1-Click Launch or Manual Launch tab
- Configure your instance as desired and launch it. Respond to the prompts as needed.
Once the instance has been launched, you can go to EC2 instances on your AWS console and monitor instance status. When the Instance State becomes running and Status Checks indicates 2/2 checks passed, you should copy its Public DNS name from the AWS console so that you can access AppSymphony Web. The public DNS name should look something like this sample:
ec2-54-91-97-44.compute-1.amazonaws.com
You should also note the instance ID, which you’ll need to login to AppSymphony. The instance ID should look something like this sample:
i-42d84aa3
Accessing AppSymphony Web Composer
AppSymphony Web is a web application, which means all you need to use it is a web browser. The web address is comprised of your instance’s public DNS plus a port number, like the following:
http://< public DNS name >:8080
So for the example public DNS name above, the AppSymphony Web address would be (SAMPLE ADDRESS ONLY):
http://ec2-54-91-97-44.compute-1.amazonaws.com:8080
After a few moments, a login window similar to the one below will pop-up.
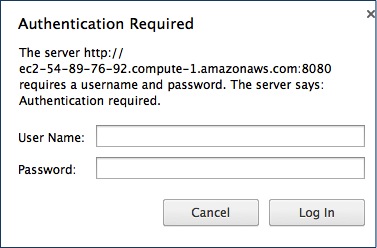
Enter User Name: appsymphonyuser and Password: <the instance ID you noted earlier>, then click the Log In button. After a few moments you’ll see a splash screen and then AppSymphony Composer in your browser window. Voila, you’re ready to compose apps in AppSymphony Web!
Composing Apps
Ah, yes that’s definitely the next topic, but is outside the scope of this ‘getting started’ document. Fortunately, we have an in-depth AppSymphony user guide that will help you. Please check it out here.
Getting Support
If you had any trouble launching up your AppSymphony instance, ask for help! We’d love to hear from you. Click here for support.
Additional Resources
Click here to view AWS’ FAQ on subscribing, launching and managing Marketplace products.