
Hello AppSymphony!
For the first blog post on our flashy new website, I’m going to demonstrate how to create a tried and true example – good ol’ Hello World – using AppSymphony’s web-based Composer. While AppSymphony is mainly used to develop powerful analytic apps, I thought a simple example would be the best starting point for those new to AppSymphony. Before diving in, let’s take a look at the web-based AppSymphony Composer.
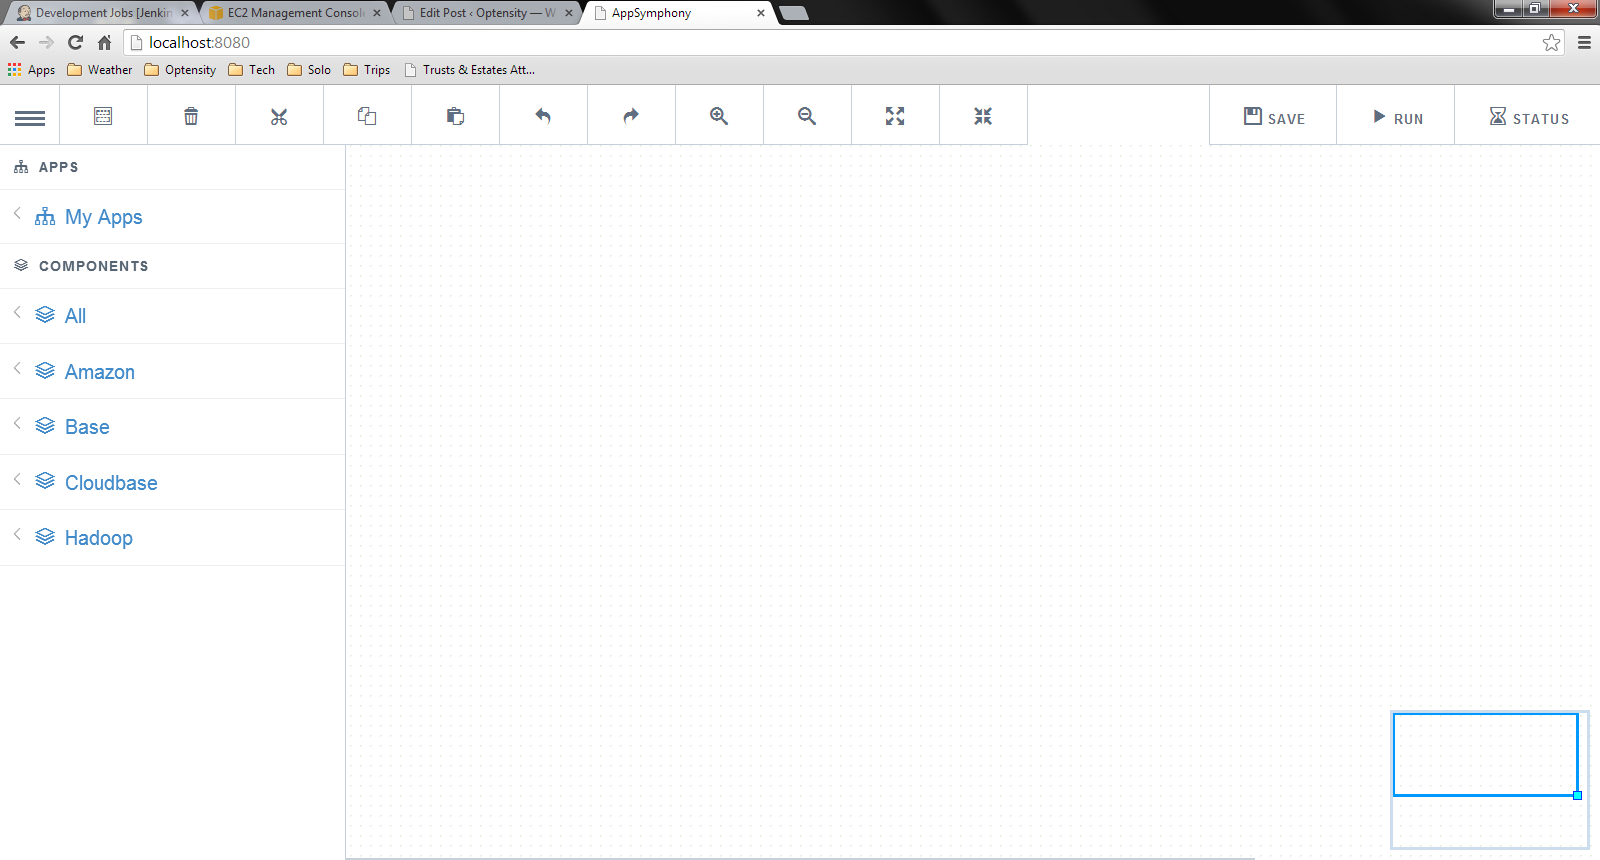
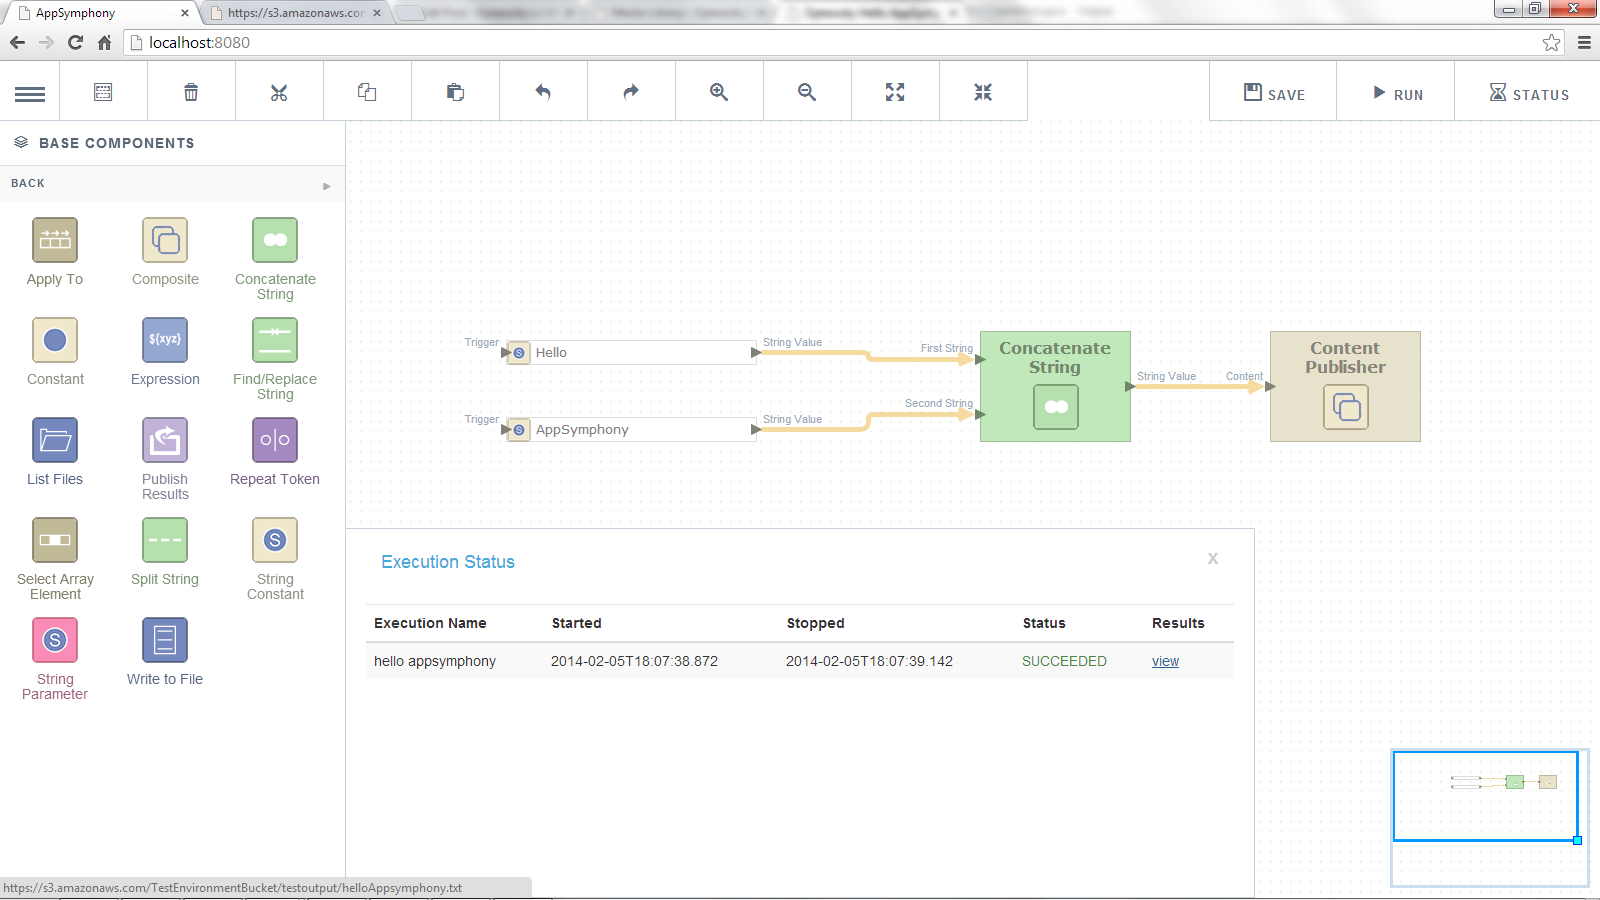
From the left-menu, there’s access to Apps and Components. Components are initially displayed by the Ensemble they are bundled with, where the “All” Ensemble contains every Component. An App is an executable workflow, created by connecting one or more Components together on the Composer’s canvas, that is used to achieve some end goal. Each Component within an App is executed in-order, with the output of one Component becoming the input of the next Component.
On the left-side of the top-menu, there’s access various diagramming controls that aid in routine composition tasks. On the right-side of the top-menu, there is access to controls that act on the composed App – you can Save or Run an App and then watch its execution Status.
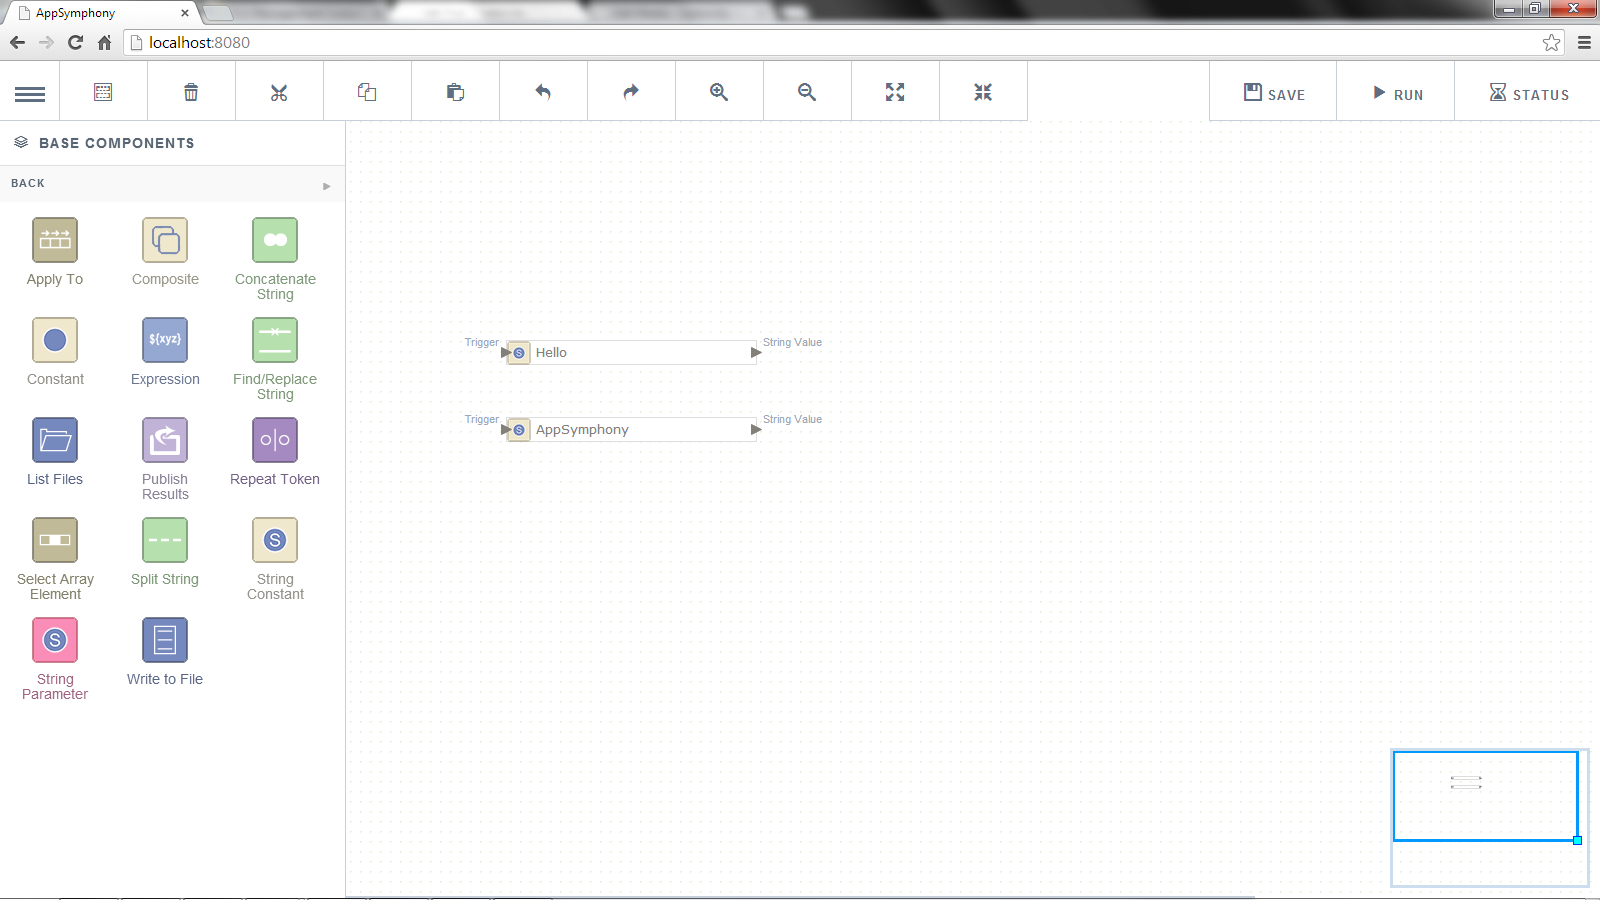
To create the Hello World App, select the “Base” component Ensemble. Next, select and drag two “String Constant” Components onto the canvas. Double-click on each component to change its “String Value” parameter. I’ve used Hello” and “AppSymphony”.
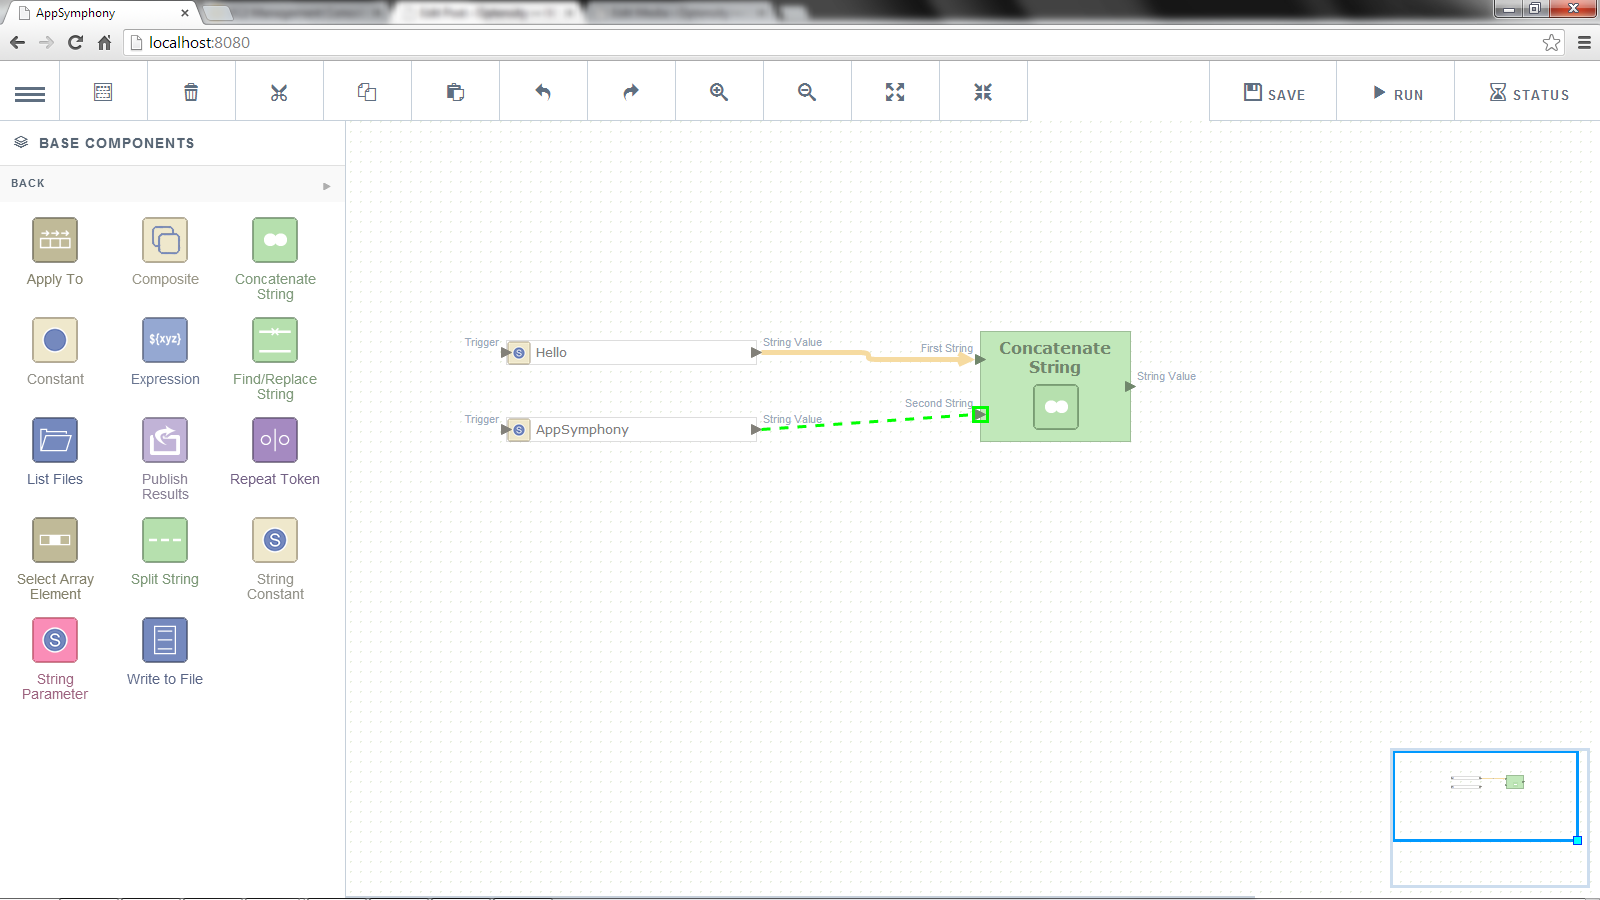
Next, select and drag a “Concatenate String” Component onto the canvas. Select and drag the “String Value” output port from each “String Constant” to one of the input ports of “Concatenate String”.
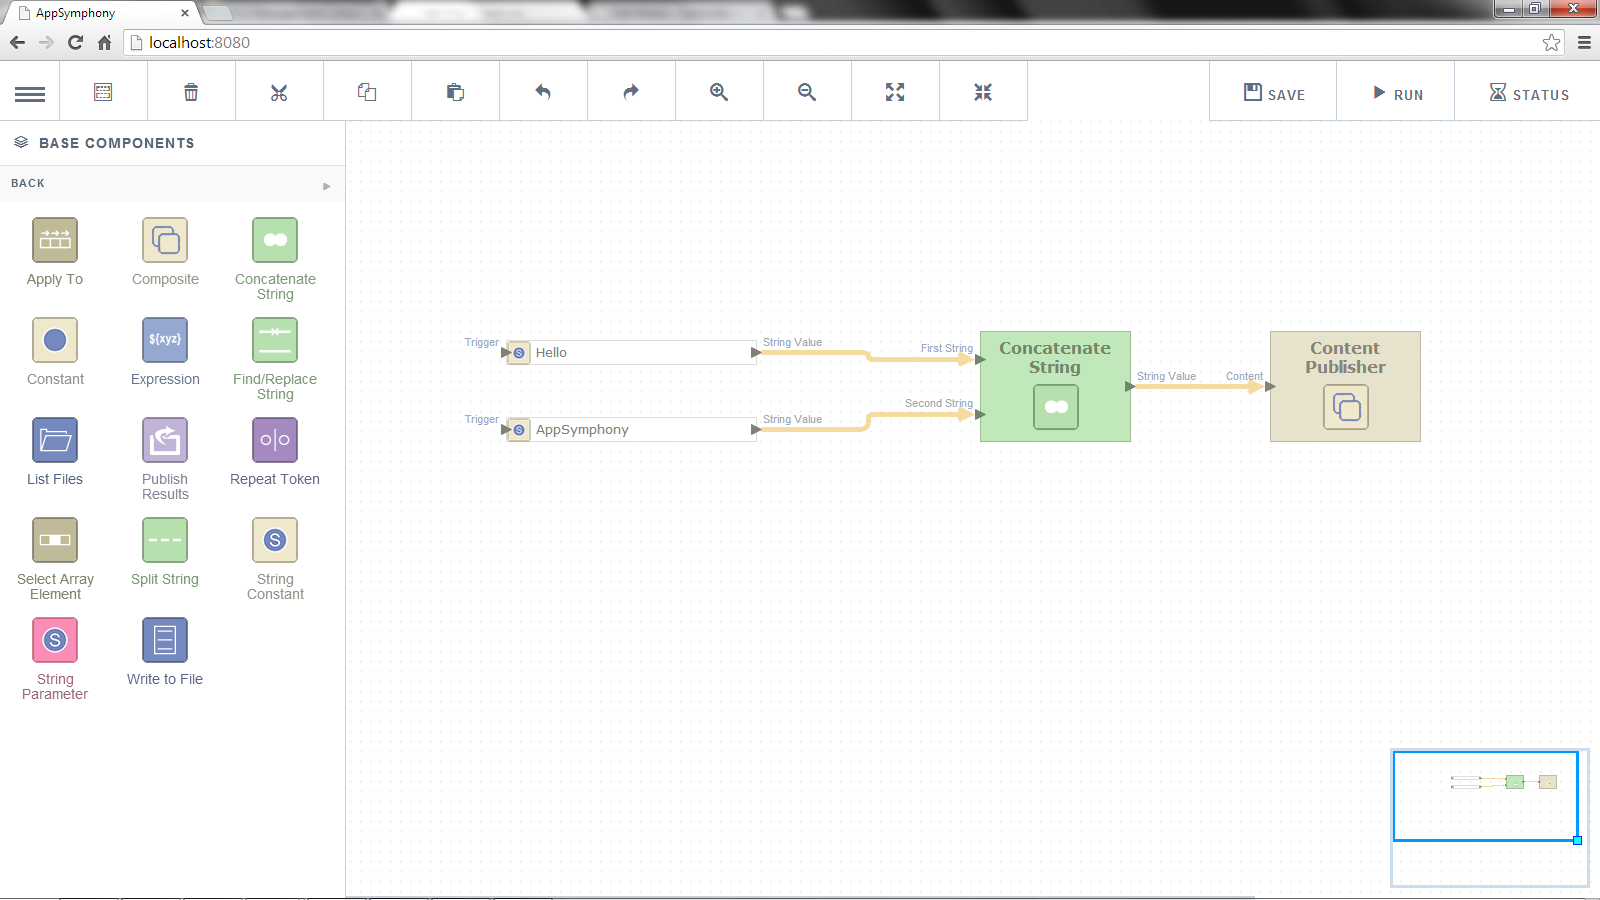
And…that’s it! Well, almost. From a composition perspective, we’ve finished composing a Hello World equivalent. There’s one more step needed to take the output from “Concatenate String” and make it visible through the Composer. I’m going to gloss over that final step for now, using a pre-created Upload Content component that will handle those final details.
To execute this example, click on the “Save” button to save the App to the AppSymphony Repository, where it will be stored for future use (like more upcoming Blog posts). Then click “Run” to execute the App.

When the App has reached the SUCEEDED status, click on the “view” link to see the results. “HelloAppSymphony” (or whatever values were provided to the “String Parameter” Components) will appear in its own browser tab.
Author: optensity
Similar Posts
Leave A Comment
You must be logged in to post a comment.